How to Crochet a Chain (ch) – A Beginner’s Guide

How to Crochet a Chain (ch)

Crocheting is a beautiful and versatile craft that allows you to create everything from cozy blankets to intricate lace designs. If you’re just starting out on your crocheting journey, learning the basics is essential. One fundamental skill you’ll need to master is crocheting a chain, often abbreviated as “ch” in patterns. The chain serves as the foundation for many crochet projects, so let’s dive into how to crochet a chain step by step:
Step 1: Gather Your Materials
Before you begin, make sure you have the necessary materials on hand:
- Yarn: Choose a yarn appropriate for your project. Thicker yarns work well for beginners as they are easier to handle.
- Crochet hook: Select a crochet hook size that complements your yarn weight. The recommended hook size is usually indicated on the yarn label.
Step 2: Make a Slip Knot
To start your chain, make a slip knot. Here’s how:
- Hold the yarn in your non-dominant hand, leaving a tail of about 6 inches.
- Create a loop with the yarn, crossing the end over the working yarn.
- Insert your crochet hook through the loop and grab the working yarn with the hook.
- Pull the working yarn through the loop to create a slip knot. Adjust the knot by pulling on the tail and working yarn until it’s snug but not too tight.
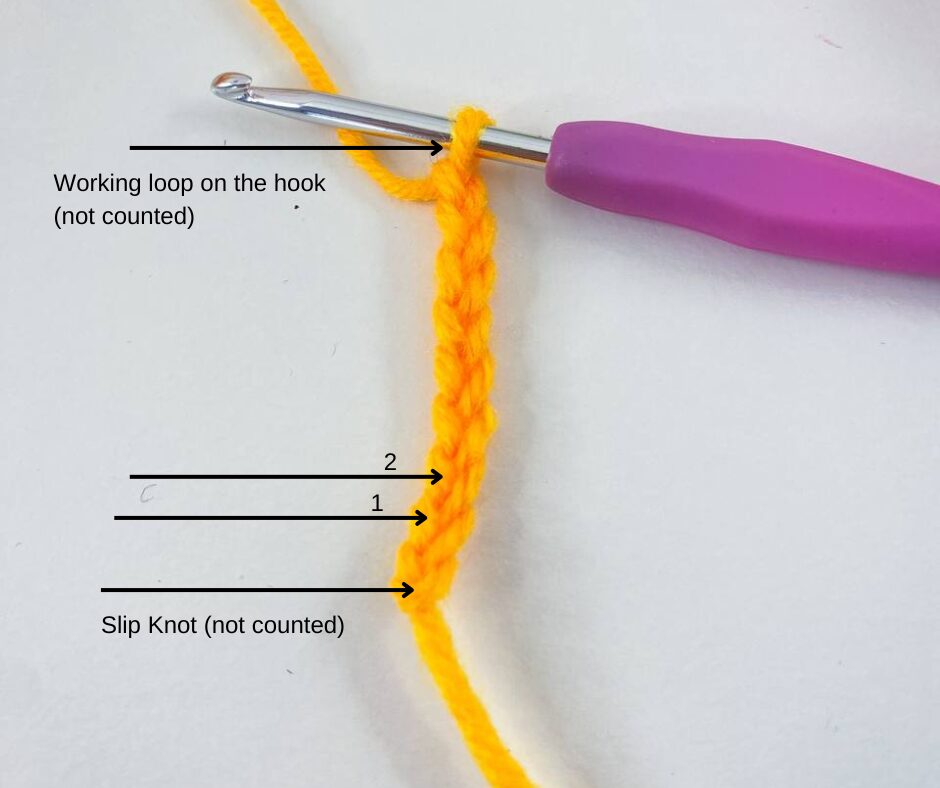
Step 3: Begin the Chain
Now that you have your slip knot, it’s time to start crocheting the chain:
- Hold the crochet hook in your dominant hand, with the slip knot on the hook.
- With your non-dominant hand, hold the tail of the slip knot and the working yarn securely.
- Yarn over: Bring the yarn from behind the hook, wrapping it over the top of the hook from right to left (if you’re right-handed) or left to right (if you’re left-handed).
- Pull the wrapped yarn through the slip knot loop on your hook. This action creates one chain stitch.
- Repeat steps 3 and 4 for each additional chain stitch you want to make.
Tips for Success:
- Keep your tension consistent. Not too tight, not too loose. This will ensure your chain is even and not too tight to work into for subsequent rows.
- Practice! The more you crochet, the more comfortable and proficient you’ll become.
- Don’t worry if your chain doesn’t look perfect at first. It’s normal for beginners to have uneven tension or slightly twisted chains. With practice, your chains will improve.